Montessori Culture and Science, and More! Ukrainian Easter Egg Activities
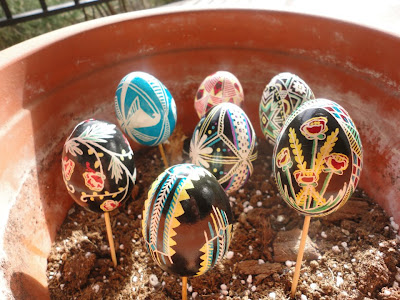
As we have noted in many previous posts, tying activities and study themes for the classroom to holidays celebrated around the world is an excellent way to create interest and make subjects more relatable for students. Ukrainian Easter eggs (pysanky or писанка in Ukrainian) open the door to many curriculum ideas:
- Creating the eggs is a beautiful and challenging art project.
- Drawing designs with a traditional kistka or a crayon develops fine motor control.
- The country Ukraine, as well as traditional designs, can be tied into a history or geography unit.
- The process of wax resist dyeing is an interesting science experiment.
- Breakable eggs, spillable dyes and candles or hot hair dryers require extra care, allowing students to enjoy responsibility.

Ukrainian Easter eggs have been made since ancient times. These beautiful eggs are made to be given as gifts to family and friends, and to celebrate and create good fortune for the upcoming year. Traditional designs have special meanings, like wishes for a good harvest or representing fire, water, and the sun. NAMC hopes you will enjoy this complimentary printable, which has examples of traditional designs that can be laminated and used during your pysanky activities.
Ukrainian Easter Egg Activities for the Preschool Classroom
Since using a kistka and an open flame can be dangerous and difficult, there are many ways to enjoy making pysanky that will still challenge and excite your preschool students.


- In the complimentary printable, we have included a blank egg template. Children will love coloring and decorating their own eggs after learning about traditional designs.
- Color the egg with pencil crayons or felts for detailed decorations.
- Draw colorful designs with crayons, then paint over the designs with watered down black paint for a wax resist effect.
- Fill the entire egg with many bright colors of crayon, then paint completely over it with thick black paint. When the paint dries, children can use a craft stick or other object to scrape patterns in the paint, revealing the beautiful colors beneath!
- If you would like to use dye, children can color directly onto the eggs with crayons. Use many colors of crayons with a dip into a solid color dye. The colors of the crayons will shine through!
- Rubber bands wrapped around an egg will protect the color underneath in straight line patterns.

Ukrainian Easter Egg Activities for the Elementary Classroom
Ukrainian supply stores are actually very common, and you will very likely be able to find inexpensive pysanky supplies by searching online. If you do not have the time or do not have a close supplier, there are still ways to create pysanky with your students with readily available craft components!
 |
| Some examples of traditional kistkas, which can be made of wood, wire, metal, and plastic. These are similar to pencils that dispense heated wax through a hole in the tip. |
How to Make Wax Resist Pysanky:
- Prepare your eggs and dyes ahead of time. The day before your class decorates the eggs, take them out of the fridge so they will be at room temperature for drawing. Add a tablespoon of white vinegar to your dye mix so that it will bond to the shell quickly and brightly.
- Encourage students to plan their designs lightly with a pencil. (When you wipe away the wax, it will take the pencil marks with it.) Having a basic design makes it easier to explore color choices during the dyeing process! Make sure students wash their hands thoroughly; grease or oil could effect the dyeing process.
- On a piece of paper, color a solid block with a crayon. Drop a small amount of dye onto the crayon, and one onto the bare paper. Discuss with students how the bare paper is absorbent like an eggshell, and how the crayon wax protects the "egg" underneath from the dye, which can be wiped away with a paper towel. This is the entire idea behind creating pysanky! Wherever you place the wax, what is underneath will be preserved.
- If students will be using kistkas and candles, go over some quick safety tips. To use a kistka, heat the tip in the candle flame, then use the open back to scoop up a small amount of beeswax. The hole in the tip will let students apply the wax just like using a pencil. If the wax stops flowing, reheat the kistka, or add a little bit more. A little goes a long way!
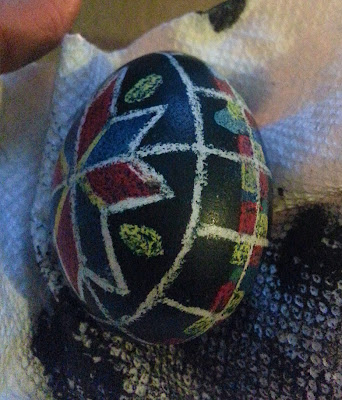
- If students will be using crayons, no candles are required. Start the design on a white egg. Wherever you draw with the crayon or kistka, that area will be white.


- Dip the eggs into the yellow dye, pat dry with a paper towel, and repeat the previous step. Wherever the wax goes, the color will stay underneath! Keep dyeing the egg and covering areas with wax, from the lightest color to darkest color.
- To reveal the patterns and colors, carefully hold the egg close to a candle flame, and when the wax melts and becomes shiny, wipe it off with a clean paper towel. If you do not want to use an open flame in the classroom, a hairdryer on the hottest setting will work - just make sure you place the eggs on a table with a paper towel underneath while they are being heated.

- The eggs are done, and will be beautiful and shiny because of the wax rubbed into the shells! If your class would like, you can poke holes in each end of the egg with a nail and empty them by blowing. If you choose not to, the insides will dry out over time, but can potentially be unpleasant if they break in the future! Students can also spray or paint the eggs with a protective coating, if so desired.
Will your Montessori classroom be working on Ukrainian Easter egg activities? If your classroom would like to show the results, NAMC would love to share your beautiful pysanky with the Montessori community!
As much as possible, NAMC’s web blog reflects the Montessori curriculum as provided in its teacher training programs. We realize and respect that Montessori schools are unique and may vary their schedules and offerings in accordance with the needs of their individual communities. We hope that our readers will find our articles useful and inspiring as a contribution to the global Montessori community.
© North American Montessori Center - originally posted in its entirety at Montessori Teacher Training on Thursday, March 21, 2013.
© North American Montessori Center - originally posted in its entirety at Montessori Teacher Training on Thursday, March 21, 2013.


0 comments:
Post a Comment
Have questions or comments? Let us know what you thought about this article!
We appreciate feedback and love to discuss with our readers further.